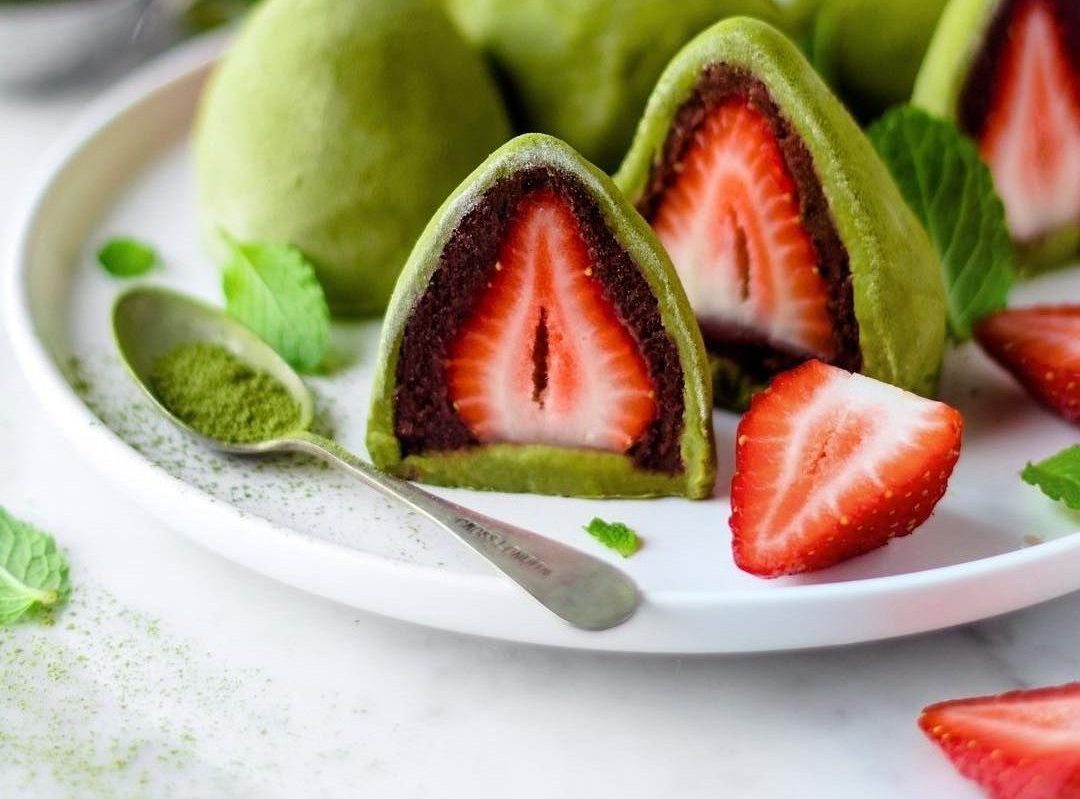
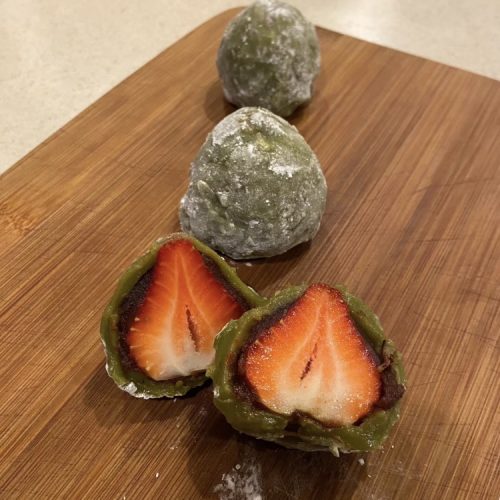
Daifuku: Japanese Mochi with Strawberry filling
This is one of my favorite foods ever! If you travel to Japan, it is a must-try. In Japan, fruits are prized, and some are even branded. Can you imagine a Daifuku made with a Chanel strawberry? I can’t, but from the street stands where I bought my Daifuku, they still used high-quality strawberries that were so shiny and perfect they almost looked fake!
The outside skin of Daifuku is made out of mochiko, a glutinous rice flour. It’s a really chewy traditional Japanese snack, and can be flavored with matcha, sesame, peanut, or even chocolate!
The process of making daifuku is very simple, and the only cooking required can be done in a microwave. It involves three components: the mochi dough, red bean paste, and strawberries. The mochi dough comes together in under 10 minutes, and if you use ready-made red bean paste, you’re halfway done already! The hardest part about making daifuku is the assembly process because the dough is very sticky. However, if you flour your hands well it will be easier.
Kitchen Bop Music Rec: Strawberries and Cigarettes by Troye Sivan… almost as good as these daifuku.
Daifuku: Japanese Mochi with Strawberry Filling
Ingredients
- 2 cups mochiko flour the kind I use is called glutinous rice flour, which is the same thing
- ⅓ cup granulated sugar
- 1 ¾ to 2 cups water adjust according to your microwave
- Pinch of salt
- 2 tsp matcha powder (optional
- Red bean paste
- 10-12 fresh strawberries do NOT use frozen strawberries it will NOT work!
- Cornstarch for dusting work surface
Instructions
- Whisk together the mochiko flour, sugar, and salt in a large microwave-safe bowl. If you’d like to make it matcha flavored, add in the matcha powder at this point as well.
- Add 1 ¾ cups of water to the bowl, and mix until smooth. The mixture should be very watery at this point, not resembling dough at all.
- Microwave the mixture at 1 minute intervals the first 1-2 times, stirring in between. Once the mixture begins to solidify, microwave on 30 second intervals until it becomes play-dough like. In between intervals, use a spatula to mix the dough, It will be lumpy at first, but continue to stir.
- *If you don’t get the right consistency (ie. overcooked) you can go back and add a little bit more water.
- Once the dough is done (slightly tacky but holds shape well), let it cool for a bit before you start to work with it. It will be very hot, so be careful!
- Flour hands and work area well with cornstarch, and begin kneading the dough. You want to make it so that it can be formed into balls, but it should still be sticky. Do not knead in too much cornstarch into the dough because it will taste bad.
- Wash and de-stem your strawberries. Pat them dry with a paper towel. This step is super important because you don’t want soggy mochi!
- Using chilled red bean paste, cover each strawberry with it, leaving only the bottom bare. The paste might stick to your hands; I found that wetting my hands with water helped.
- Divide your dough into 10-12 pieces, and flatten the pieces out with your hands. Stretch them to cover the strawberries, and press the seams together at the base of the strawberry.
- After you rest the daifuku a bit on its seam, the seam will disappear and it will be ready to display. These are best eaten on the same day, as the strawberries will begin making the mochi soggy after a day. Enjoy!
nice
Thank you. Very good recipe, I like the Mochi very much
Thank you!!1